この記事は古いです!新しい certbot-auto を使ってください!!!
Let’s EncryptのSSL証明書で、安全なウェブサイトを公開 http://knowledge.sakura.ad.jp/knowledge/5573/
私はめんどくさいので古いのを使い続けます。
12/3 から Let's encrypt が誰でも利用できるようになったので使ってみました。今回は CentOS 6.7 で稼働中の apache 向け証明書を作成しました。ドメインの確認のため、ドメインが向いているサーバーで let's encrypt のプログラムを走らせないといけないようです。
以下のページを参考にさせて頂きましたが、稼働中のサーバーに設定するため少しアレンジしています。
無料SSL証明書の Let's Encrypt が公開されたので実際に試してみた http://www.websec-room.com/2015/12/04/2380
ここでは既にドメインの DNS の設定が済んでいる、かつ apache が稼働しているものとします。
https://letsencrypt.org/howitworks/ にやり方が載っているのですが、CentOS 6.7 の yum でインストールされる python 2.6 ではエラーが発生するので --debug オプションをつけて実行します。
git clone https://github.com/letsencrypt/letsencrypt
cd letsencrypt
./letsencrypt-auto --help --debug
以下のようなエラーが出ますが、問題なく進んでいるらしいです。
pdating letsencrypt and virtual environment dependencies...../home/user/.local/share/letsencrypt/lib/python2.6/site-packages/pip/_vendor/requests/packages/urllib3/util/ssl_.py:90: InsecurePlatformWarning: A true SSLContext object is not available. This prevents urllib3 from configuring SSL appropriately and may cause certain SSL connections to fail. For more information, see https://urllib3.readthedocs.org/en/latest/security.html#insecureplatformwarning.
 InsecurePlatformWarning
/home/user/.local/share/letsencrypt/lib/python2.6/site-packages/pip/_vendor/requests/packages/urllib3/util/ssl_.py:90: InsecurePlatformWarning: A true SSLContext object is not available. This prevents urllib3 from configuring SSL appropriately and may cause certain SSL connections to fail. For more information, see https://urllib3.readthedocs.org/en/latest/security.html#insecureplatformwarning.
/home/user/.local/share/letsencrypt/lib/python2.6/site-packages/cryptography/__init__.py:25: DeprecationWarning: Python 2.6 is no longer supported by the Python core team, please upgrade your Python.いろいろエラーが出た後に、ヘルプの文章が表示されます。
 letsencrypt [SUBCOMMAND] [options] [-d domain] [-d domain] ...

The Let's Encrypt agent can obtain and install HTTPS/TLS/SSL certificates. By
default, it will attempt to use a webserver both for obtaining and installing
the cert. Major SUBCOMMANDS are:

 (default) run Obtain & install a cert in your current webserver
 certonly Obtain cert, but do not install it (aka "auth")
 install Install a previously obtained cert in a server
 revoke Revoke a previously obtained certificate
 rollback Rollback server configuration changes made during install
 config_changes Show changes made to server config during installation
 plugins Display information about installed plugins

Choice of server plugins for obtaining and installing cert:

 --apache Use the Apache plugin for authentication & installation
 --standalone Run a standalone webserver for authentication
 (nginx support is experimental, buggy, and not installed by default)
 --webroot Place files in a server's webroot folder for authentication

OR use different plugins to obtain (authenticate) the cert and then install it:

 --authenticator standalone --installer apache

More detailed help:

 -h, --help [topic] print this message, or detailed help on a topic;
 the available topics are:

 all, automation, paths, security, testing, or any of the subcommands or
 plugins (certonly, install, nginx, apache, standalone, webroot, etc)
次に証明書の発行を行います。apache オプションは CentOS だとうまく動かないらしいので、webroot オプションを使用しました。ここでも --debug オプションを付けます。/var/www はドキュメントルート、example.com は対象のドメイン名に置き換えてください。実行すると、ドキュメントルート配下に .well-known フォルダが生成され、これがドメイン確認に使われるようです。
./letsencrypt-auto certonly --webroot -w /var/www -d example.com --debug途中でメールアドレスの入力欄と、文章読んで同意してねの画面が出てくるので、適当に入力して進みます。
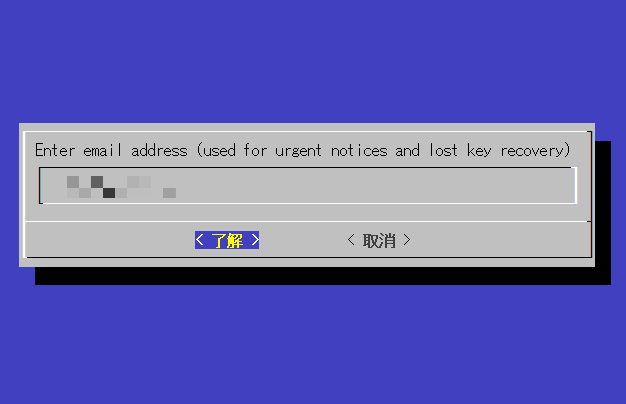

しばらくすると以下の文言が現れます。
Version: 1.1-20080819
Version: 1.1-20080819

IMPORTANT NOTES:
 - Congratulations! Your certificate and chain have been saved at
 /etc/letsencrypt/live/example.com/fullchain.pem. Your cert will
 expire on 2016-03-04. To obtain a new version of the certificate in
 the future, simply run Let's Encrypt again.
 - If like Let's Encrypt, please consider supporting our work by:

 Donating to ISRG / Let's Encrypt: https://letsencrypt.org/donate
 Donating to EFF: https://eff.org/donate-le
表示されている fullchain.pem の入っているフォルダを見ると、4つのシンボリックリンクが生成されています。
ls /etc/letsencrypt/live/example.com/
cert.pem chain.pem fullchain.pem privkey.pem
実態は /etc/letsencrypt/archive/ にあるようです。更新の際に archive フォルダに新しいファイルが作成され、シンボリックリンクを書き換えるのでしょうか。
Apache の設定は以下のように書きます。
<VirtualHost *:443>
  SSLEngine on
  SSLCertificateFile /etc/letsencrypt/live/example.com/cert.pem
  SSLCertificateKeyFile /etc/letsencrypt/live/example.com/privkey.pem
  SSLCertificateChainFile /etc/letsencrypt/live/example.com/chain.pem
</VirtualHost>
最後に Apache を再読み込みして完了です。
service httpd graceful補足ですが、今回使用した --webroot オプション以外に --apache と --standalone オプションがあります。standalone はこのプログラムが Web サーバーとして稼働して、そのサーバーを使用してドメイン認証するようです。なのですでに Web サーバーが稼働中で 80 番ポートを使用している場合は利用できません。apache オプションはよくわかりませんが、Debian を使用している場合はこれを使用することが推奨されています。
無料で使用できるのは大きいですね。StartSSL 以外の選択肢が増えた形になります。有効期限が 90 日なのが引っかかりますが、上記コマンドを打つだけなので自動化できそうです。ドキュメントの読み込みがまだまだ甘いのでもっとよく調べたいと思います。